
Preventing Disaster
First off, let's look at what can go wrong -- forewarned is forearmed, right? With pie pastry, there are two main problems: tough crust and dust crust. The former requires a knife -- or, in extreme cases, a jackhammer -- to get through the bottom crust. The latter is so dry it is more of a choky pile of crumbs than the tender, flaky crust it is meant to be.
Different factors contribute to problems like inferior texture and cracked pastry, but the biggest culprits are overhandling, too much or too little moisture, overflouring, not chilling the dough sufficiently, and pulling or stretching the dough as you move it into the pan. Every one of these is easy to avoid. Just pay attention to a few simple tips and you’re on your way to the perfect pie crust!

Tips and Tricks
There are some tips and tricks that veteran pie makers use to make sure their pastry is perfect every time, whether they’re making one county-fair winner or fifty pies for the Thanksgiving prix fixe. Keep these things in mind when you work with pie pastry:
Colder is better. The colder your fat is, the better the outcome will be. Put your butter in the freezer for a few minutes before working it into the dough. Drop a few ice cubes into your water before measuring it. Chill the dough before and after rolling out. This is critical; no shortcuts. If you don’t have time to chill your pastry; save pie-making for another day.
Butter has a lower melting temperature than shortening does. For this reason, lots of pie bakers prefer to use shortening or a shortening-butter blend. I prefer butter, even if it’s a little more challenging to work with. It’s really not that tricky, and the flavor makes it worth the effort. So go ahead and use butter, but make sure it's well chilled, and chill the pastry at each stage chilling is called for.

If you have a food processor and feel like using it, I recommend it. It is absolutely possible to make a successful pie crust by hand using a pastry blender, two knives, or even your fingers (if you’re fast and furious) to blend the fat into the flour. However, I’ll confess that since I’ve started using my food processor, it’s become my favorite method. If you do use it though, don’t go nuts; be careful not to process the fat completely into the flour. There should be a few larger bits of butter or shortening among the smaller crumbs. Think lentils and couscous. The unevenness of these bits is what will produce the flakiness of the crust as they melt down on baking. No lumps larger than peas, please.
Use a fork to incorporate your ice water into the crumb mixture. Toss rather than stir. You want the dough to clump together, and then you can start the folding/pushing part of the process.

Form your dough into a disk and roll it on its edge to even it out. Wrap tightly in plastic wrap and store in refrigerator. Double wrap and freeze for longer storage. Alternatively, you can roll it out and place it in pie dish and then wrap and freeze that.
Do not manhandle your dough. Kneading it will develop the gluten strands, making the dough tough. Push and fold your dough together rather than kneading it. It's okay to see pieces of butter in the dough; it won't be completely homogenous.
Roll your dough out between two sheets of waxed paper or baking parchment. Dust it lightly with flour and lift the paper/parchment periodically to unstick it from the dough.
When you roll the dough out, turn it by quarter turns to ensure even rolling. A good thickness to shoot for is about 1/8 inch.

If you develop a tear or a hole in your dough, wet the tip of your finger with some warm water and run it along the edges of the spot to be fixed. Place a patch of dough over the spot and roll it in. You have to wet the dough a little in order for the patch to stick. Don’t worry about it looking messy. Really.
Don’t stretch your dough to make it fit the pan. Roll out your dough, fold it into quarters, transfer it (folded) to the pie pan, and then unfold it. If it doesn’t fit, press -- don’t tug or stretch -- it into shape.

No-Fail Perfect Pastry Recipe
This recipe is a no-fail 3-2-1 formula from the CIA -- not the top-secret government organization, the top-notch cooking school. If you’ve experimented with pastry crusts involving egg yolk, mayo, vinegar, etc., this will seem easy on a silly level. Like, preschool-playdough easy. Don’t question the masters. When someone makes pies for a living, listen when they tell you what works. Get out your scale for this. You’re making pie pastry like the pros now.
Ingredients:
- 12 ounces flour
- 8 ounces cold butter, cut into very thin slices or grated if frozen
- 4 ounces ice water
Preparation:
Weigh out your flour and place it in a large mixing bowl. Sprinkle butter over flour. Using two knives or a pastry blender or your gloved fingers, quickly work the butter into the dough until crumbs are formed. If using food processor, process just until crumbs form.
Add ice water all at once. Use a fork to blend until dough just clings together. (If using food processor, dough should just barely clump together in center around blade.)
Press and fold dough just until it forms a shaggy ball. Divide it into two, form each part into a rounded disk, and wrap tightly in plastic. Refrigerate dough for 1 hour before using.
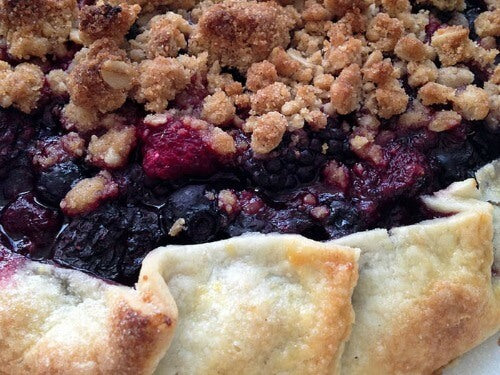
Photos are courtesy of the author.
![Iced Tea Variety Pack [6-Pack Variety of Flavors]](http://www.plumdeluxe.com/cdn/shop/files/16-1800x1800.png?v=1780116802&width=239)
![Tropical Escape Tea Variety Pack [6-Pack of Flavors]](http://www.plumdeluxe.com/cdn/shop/files/14-1800x1800.png?v=1780119100&width=239)

![Peach Tea Variety Pack [6 Full Size Teas]](http://www.plumdeluxe.com/cdn/shop/files/2-1800x1800_5.png?v=1780124594&width=239)


